DIY
Premium Tesla Model S Rear Seat Cup Holders (PARZ) Review
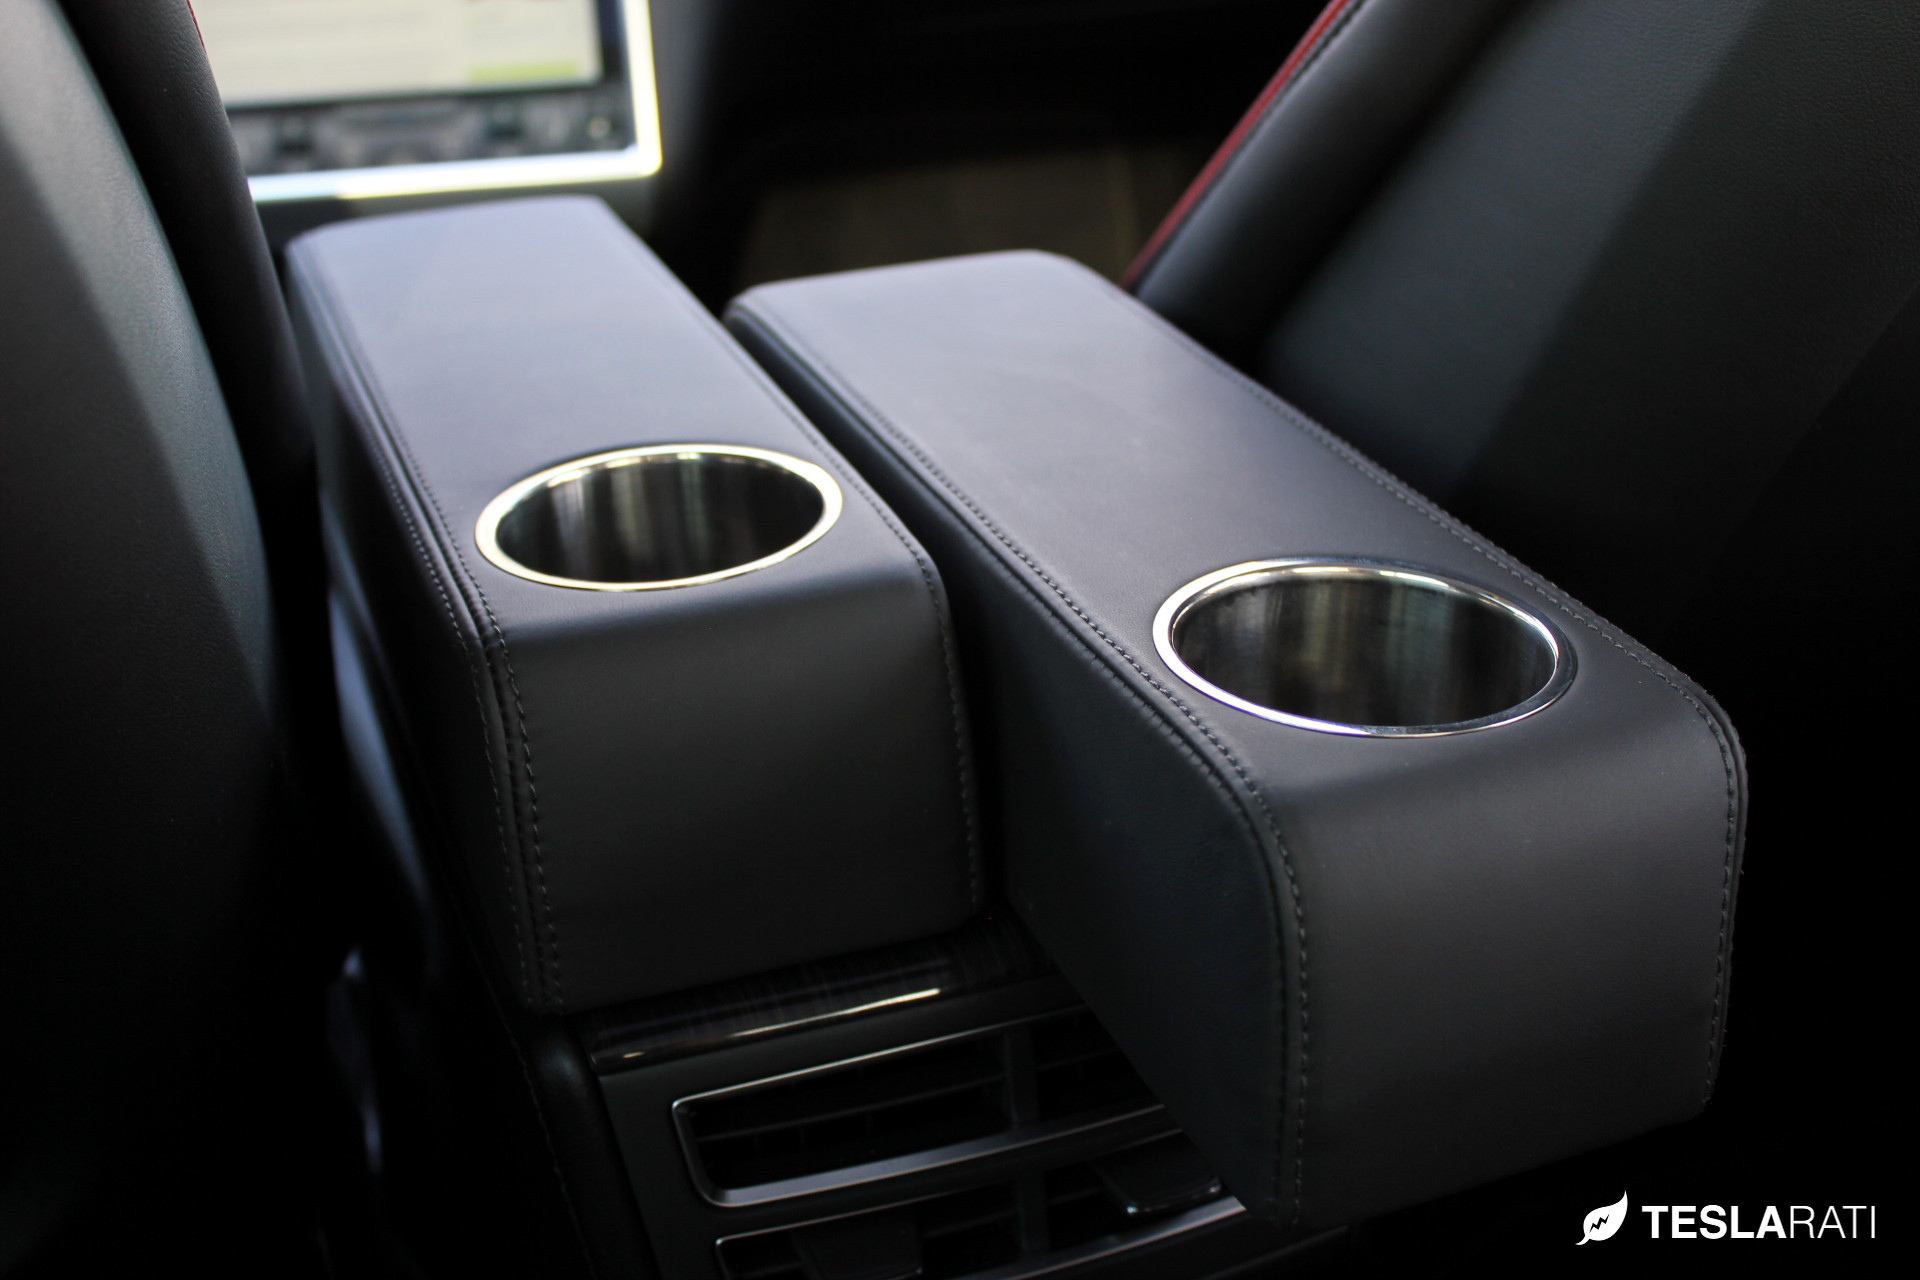
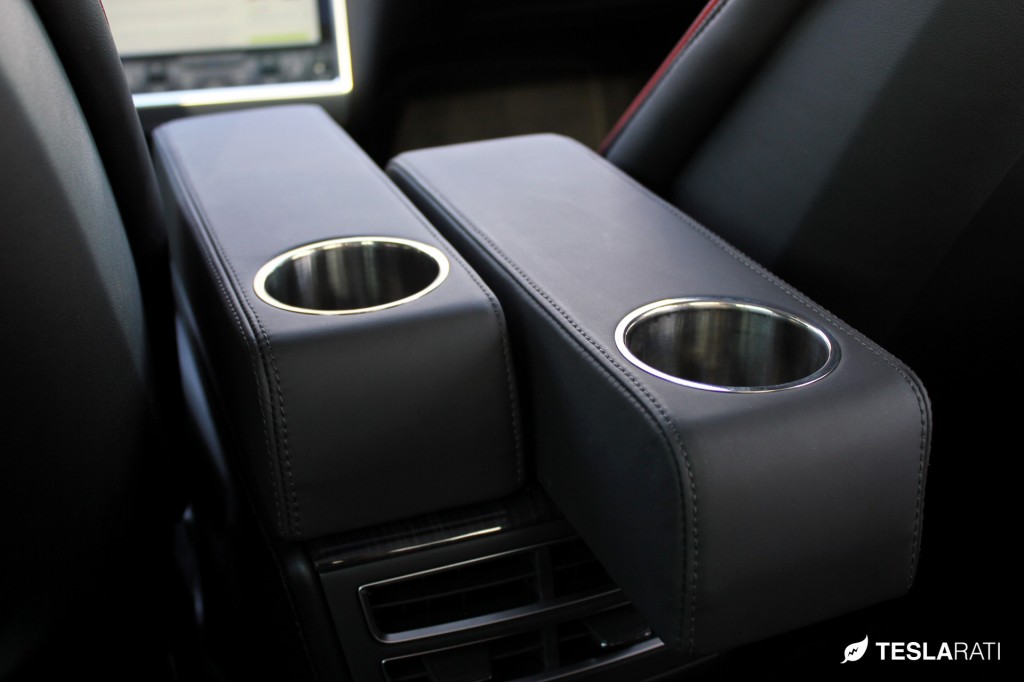
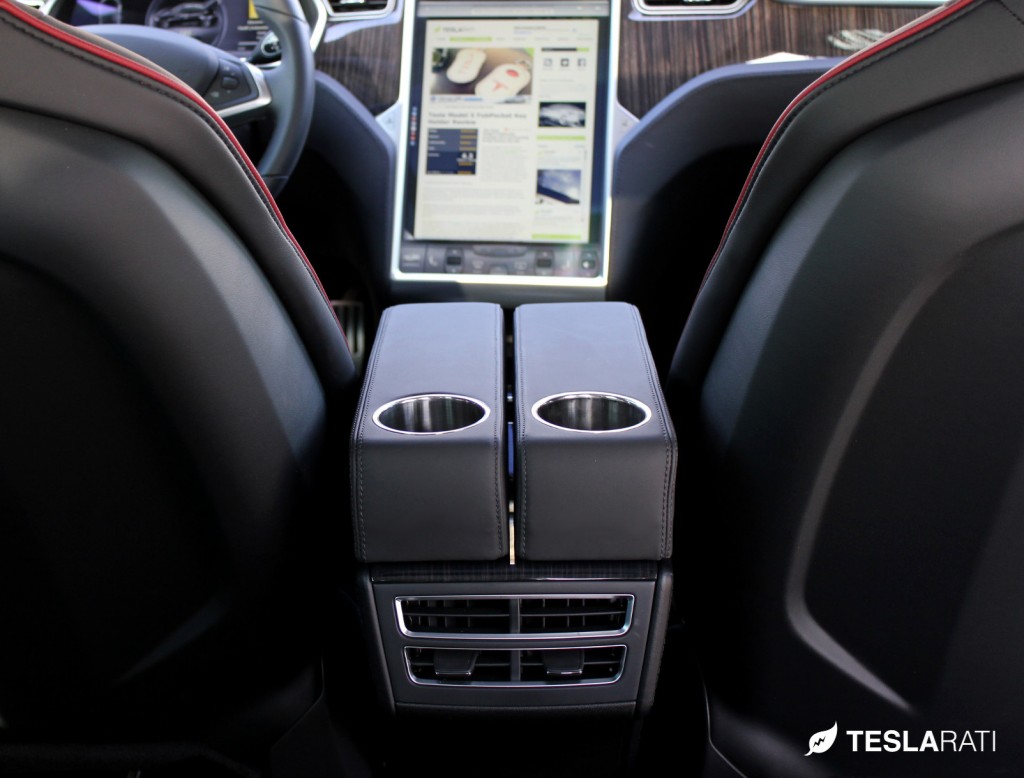
The premium Model S rear seat cup holders; (PARZ) is an integrated armrest upgrade that maintains the full functionality of the factory slider units.
Before we even jump into the review, let’s acknowledge the elephant in the room. PARZ stands for Premium Arm Rest Zarf, and if you’re anything like us and don’t know what a zarf is, wiki will tell you that a zarf is a handleless metal cup holder. A very fitting name considering these premium rear seat cup holders are made from full stainless steel.
Frank Tatum, founder of Hauptburg Industries, world-renown fabricator, and a Tesla owner, saw the need for premium Model S rear seat cup holders that would stand worlds apart from the basic 2nd row offering from Tesla Motors. Guided by the intent to complement and enhance the Model S interior design and functionality, the Premium Arm Rest Zarf was born: being sold exclusively through EVannex.
Do I Really Need Rear Seat Cup Holders?
Yes, and here’s why.
If you’ve ever chauffeured a pair of toddlers around, each with their own drippy sippy cup that seems to tumble endlessly across your precious back seats, or experienced the nervous thrill of clenching a grande latte between your knees for 2+ hours while on an extended road trip [to the 2013 SEMA Show], you’d know that there’s a definite need for Model S rear seat cup holders.
Installation
The PARZ installation guide clearly states that “professional installation” is required, however we’re not quite sure if that’s due to liability reasons or because unconventional tools are needed for the installation. Installation requires complete removal of the factory arm rest which may sound daunting at first, but we found it to be pretty straight-forward and not overly complex. That says a lot considering we’re not even that handy.
In our opinion, the installation can be performed in less than 1 hour by any savvy do-it-yourselfer (DIY). If you’re handy enough to perform basic drywall repairs or adept at changing your own oil + filter on an ICE vehicle (yes, we said the “I” word), then installation of the PARZ will come off as being pretty simple.
Tools Required (not included)
- Needle Nose Plier
or Vice-grip
- Body Trim Removal Tool
or Plastic Putty Knife (any thin wedge will suffice
)
- T20 Standard Torx Screwdriver
- 8mm Nut Driver
Installation Time: 1 hour
Editor’s note: The installation time takes into account the time it took for us to document the entire process.
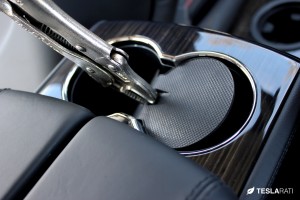
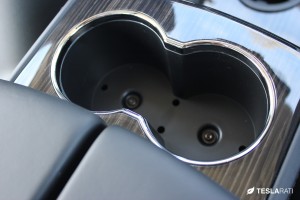
Slide back both of the factory arm rests and expose the front cup holders. Using a pair of pliers (we opted for a vice-grip), pinch the center indents of the non-slip rubber pad which lines the bottom and proceed to remove it from the cup holders. Loosen and remove the two T20 torx screws located on the bottom of the cup holders. Set aside screws for reuse.
Level of difficulty (1 easiest, 5 most difficult): 1
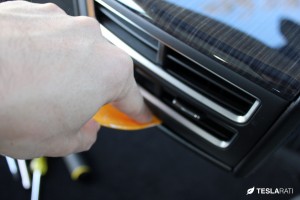
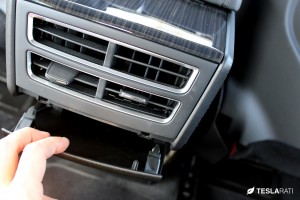
Slide the arm rests forward and remove the central arm rest assembly’s back panel by inserting the plastic putty knife blade in the gap directly beneath the air conditioning vents; gently wedging open the back panel enough to firmly grip it’s upper portion in your finger tips; pulling the panel down and completely away from the assembly, releasing the metal tension clips that hold the panel in place.
The plastic panels are fairly flexible and do not distort so do not be alarmed when prying the panels away from the metal tension clips. It will require a firm tug in order to release the clips. Courtesy of our service rep from the Santa Monica Tesla store.
Level of difficulty (1 easiest, 5 most difficult): 2
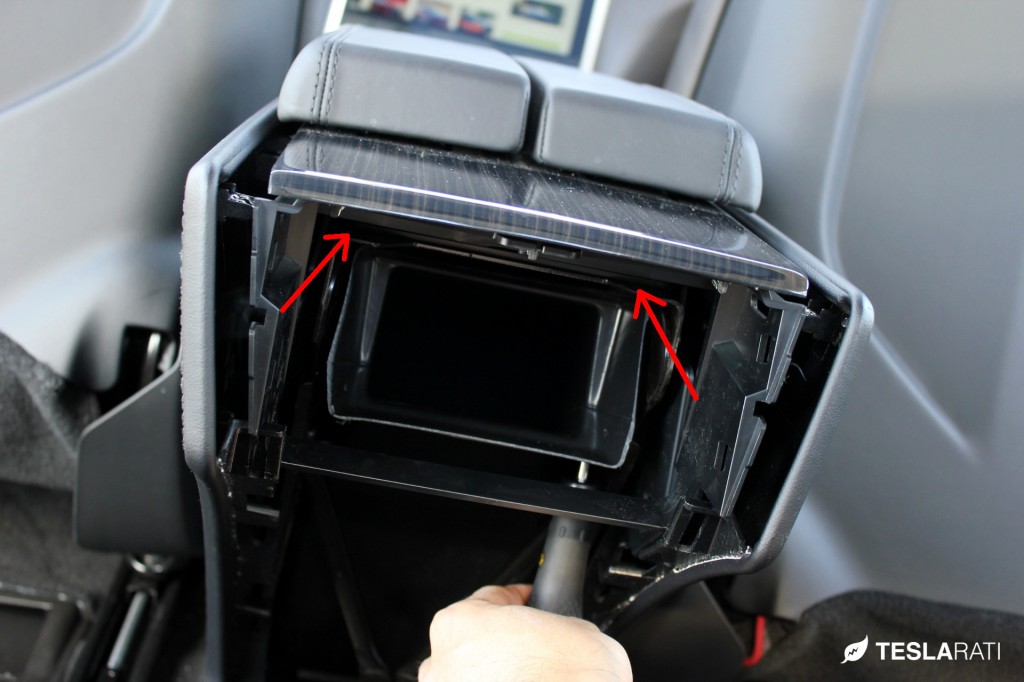
Once you have the back panel detached, use the same plastic putty knife and gently wedge open the central arm rest assembly’s side panels far enough to expose and comfortably access two midline screws on either side of the assembly. Pop off the side panel until there's a clear line of sight to the two T20 midline screws. Do not fully remove these side panels.
[box type="shadow"]Tip: The T20 screws will need to be accessed on an angle so be very careful not to strip the screws. Apply firm pressure when unscrewing.
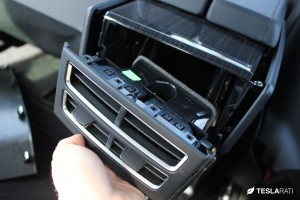
Once the screws are removed (be careful not to drop the screws into the assembly), the rear air conditioning vent assembly can be gently pulled out. A slight upward rotation as you pull may ease extraction.
Level of difficulty (1 easiest, 5 most difficult): 3
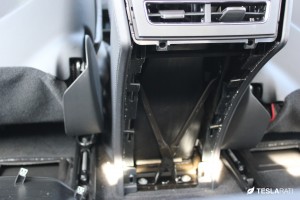
Once the back panel and rear air vent is removed, you'll need to locate and remove two T20 screws behind the flange of the air conditioning duct.
Editor's note: We were surprised to see that the entire core of the assembly was completely hollow!
Accessing these two screws will be the most difficult part of the entire installation because the screws are relatively hidden from view. The best way to access these is to lie down on the floor of the vehicle cabin while looking up towards the screws. You'll need to lie down in both directions: once with your head facing east and another time facing west.
Once you locate the screw, pull the inside of the flexible air conditioning duct to the side, as necessary, to provide greater access to the screws. Use both hands; with one hand blocking the screw from falling into the assembly while the other hand unscrews the T20 screw. Just before the screw is fully unthreaded, secure it between your fingertips so that it can be gently maneuvered out. Do not drop the screw into the assembly.
Level of difficulty (1 easiest, 5 most difficult): 5
[box type="shadow"]Tip: Reassembly will require just as much attention to detail.
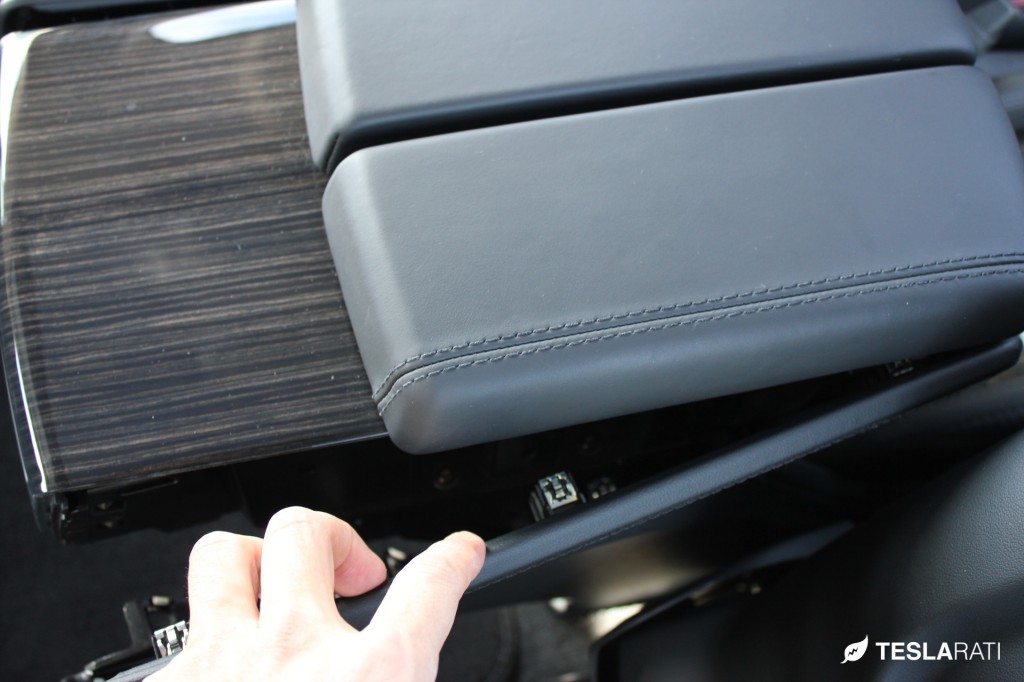
Remove the entire top portion of the central arm rest assembly by: (a) first lifting the rear of the assembly top; and (b) lifting entire assembly top simultaneously forward and upward until free of the lower portion of the central arm rest assembly.
[box type="shadow"]Tip: Thanks to a visitor submitted tip, be sure to gently pry the central arm rest assembly from the plastic front facing panel which should remain attached to the base.
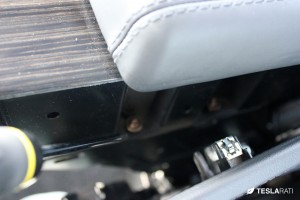
Place the armrest (cushion side down) onto the floor of the rear cabin, exposing the four nuts that hold the armrest cushions to the assembly.
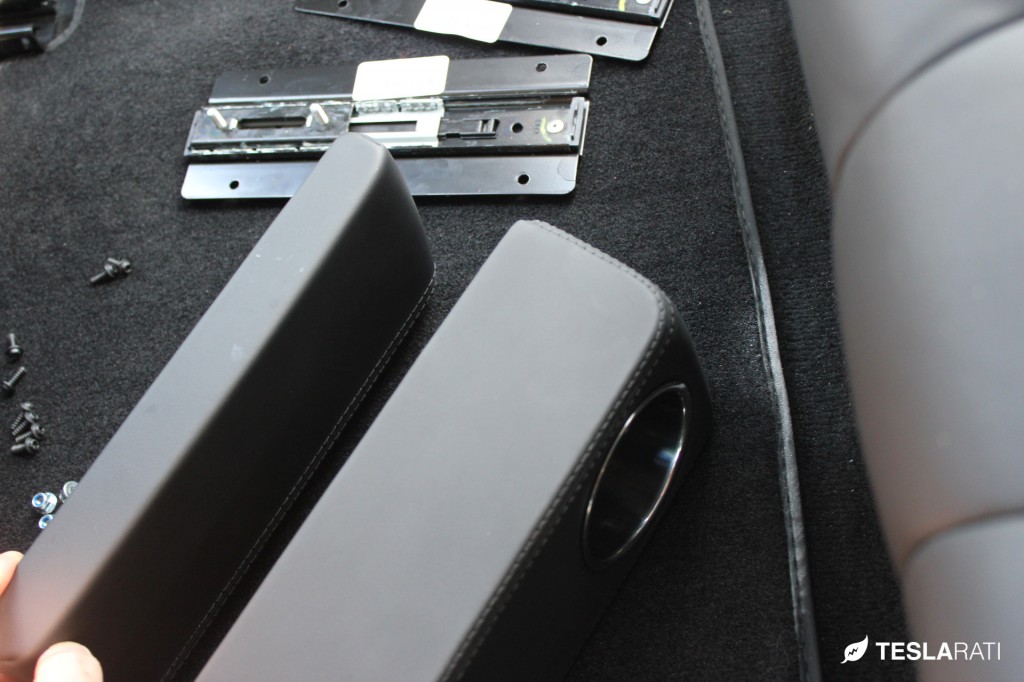
Remove the four nuts using the 8mm nut driver. Lift the assembly away from the arm rests, exposing the slide mechanisms on the underside of the armrests. Using the T20 torx screwdriver, remove the screws that fasten the slide mechanism to the driver- side stock armrest.
Place the slide mechanism on the underside of the driver-side PARZ unit, lining up the slide mechanism holes with the holes in the underside of the PARZ unit. Attach the stock driver-side slide mechanism to the driver-side PARZ unit using the same screws.
Reverse all steps from above and re-assemble the entire center armrest assembly with PARZ. Installation is complete!
Level of difficulty (1 easiest, 5 most difficult): 2
[tabs slidertype="simple"] [tab]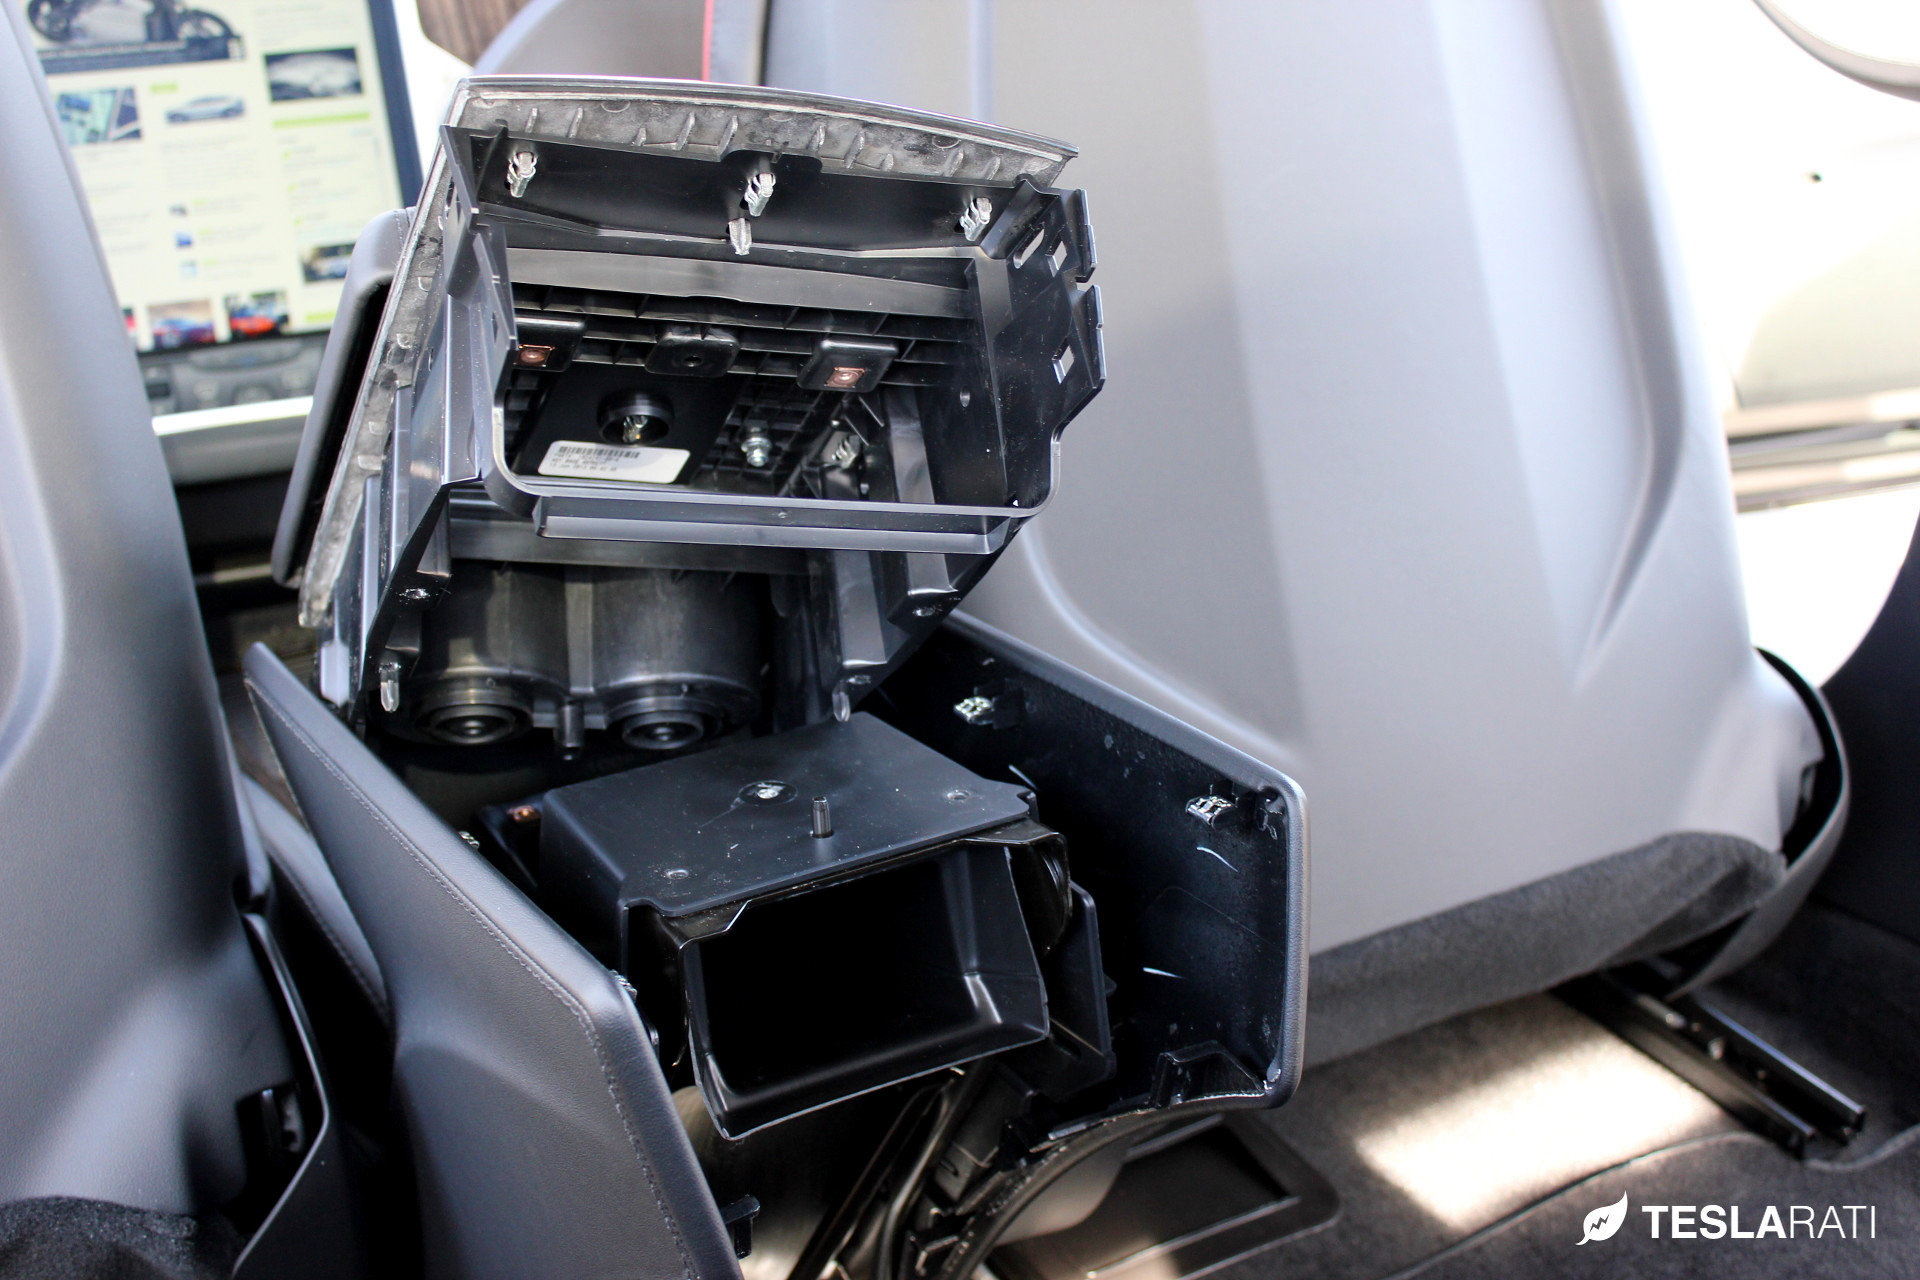
Gently pry the central arm rest assembly from the plastic front facing panel before lifting and removing. Credit: Visitor submitted[/tab] [tab]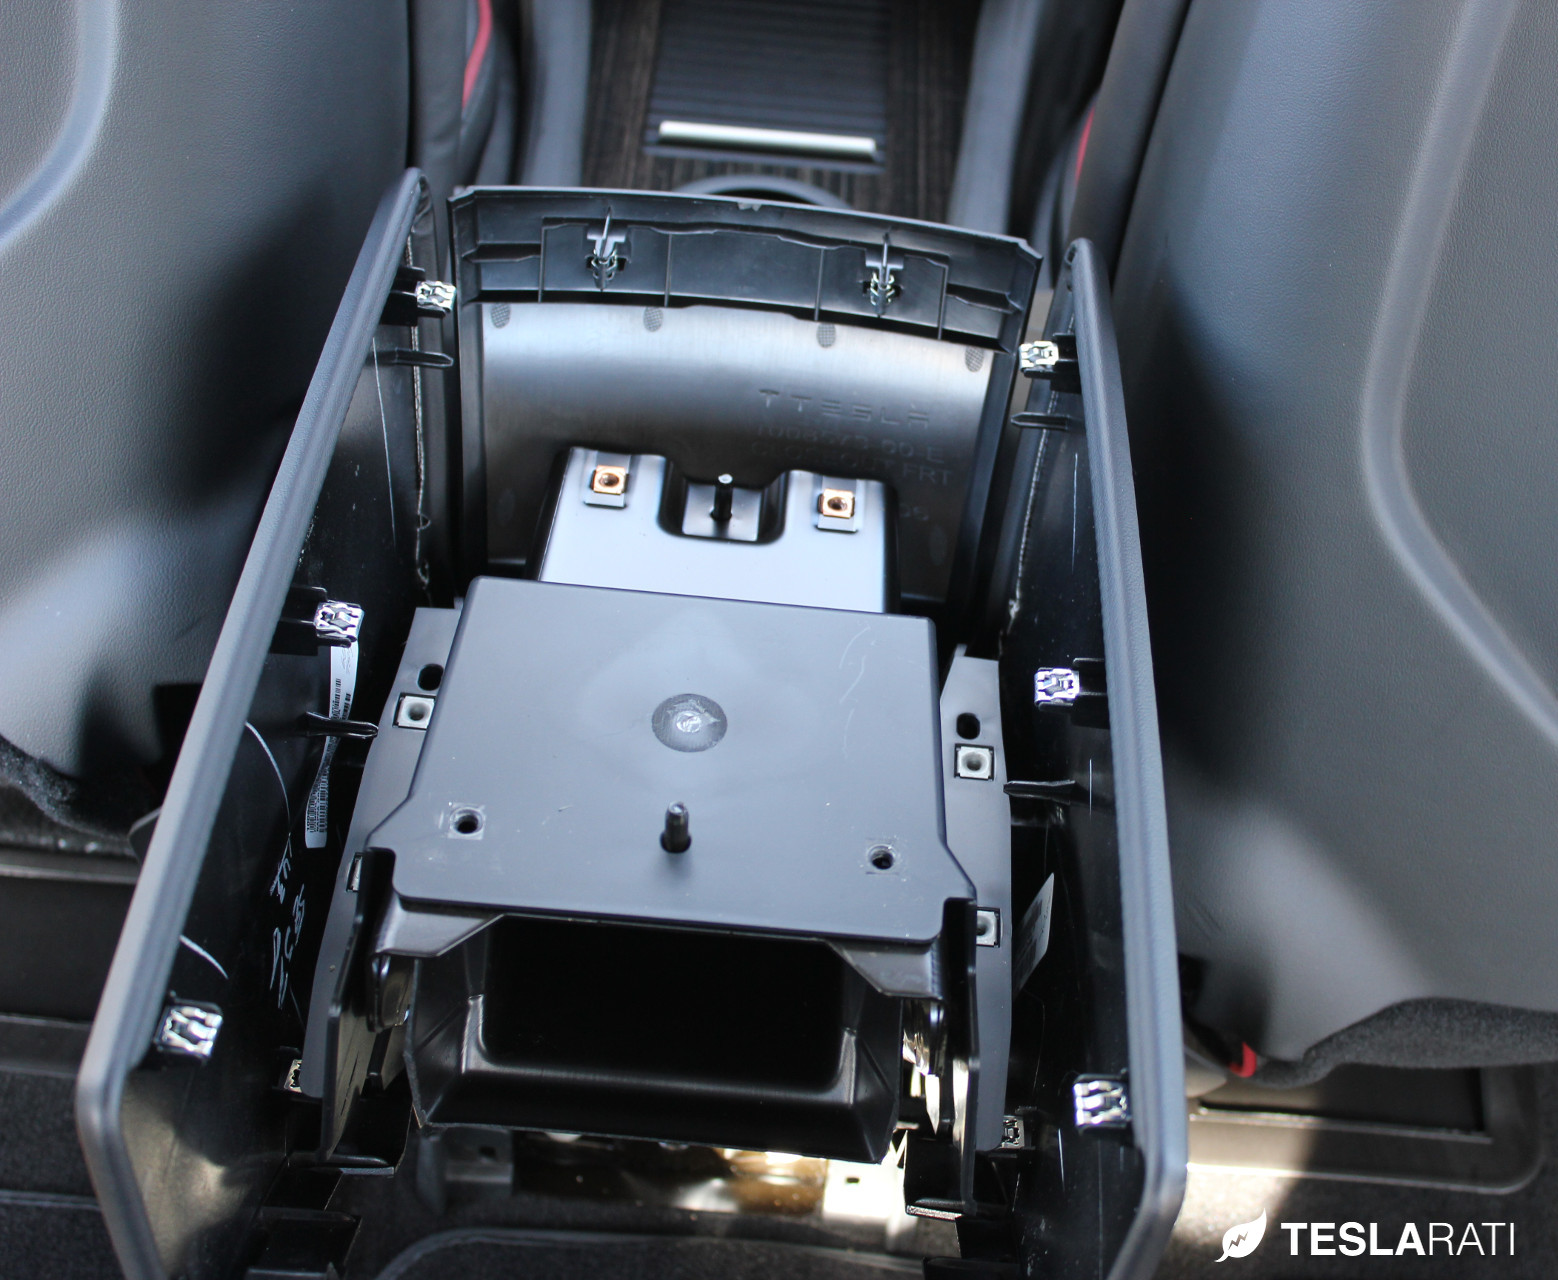
Top view with the armrest assembly removed[/tab] [tab]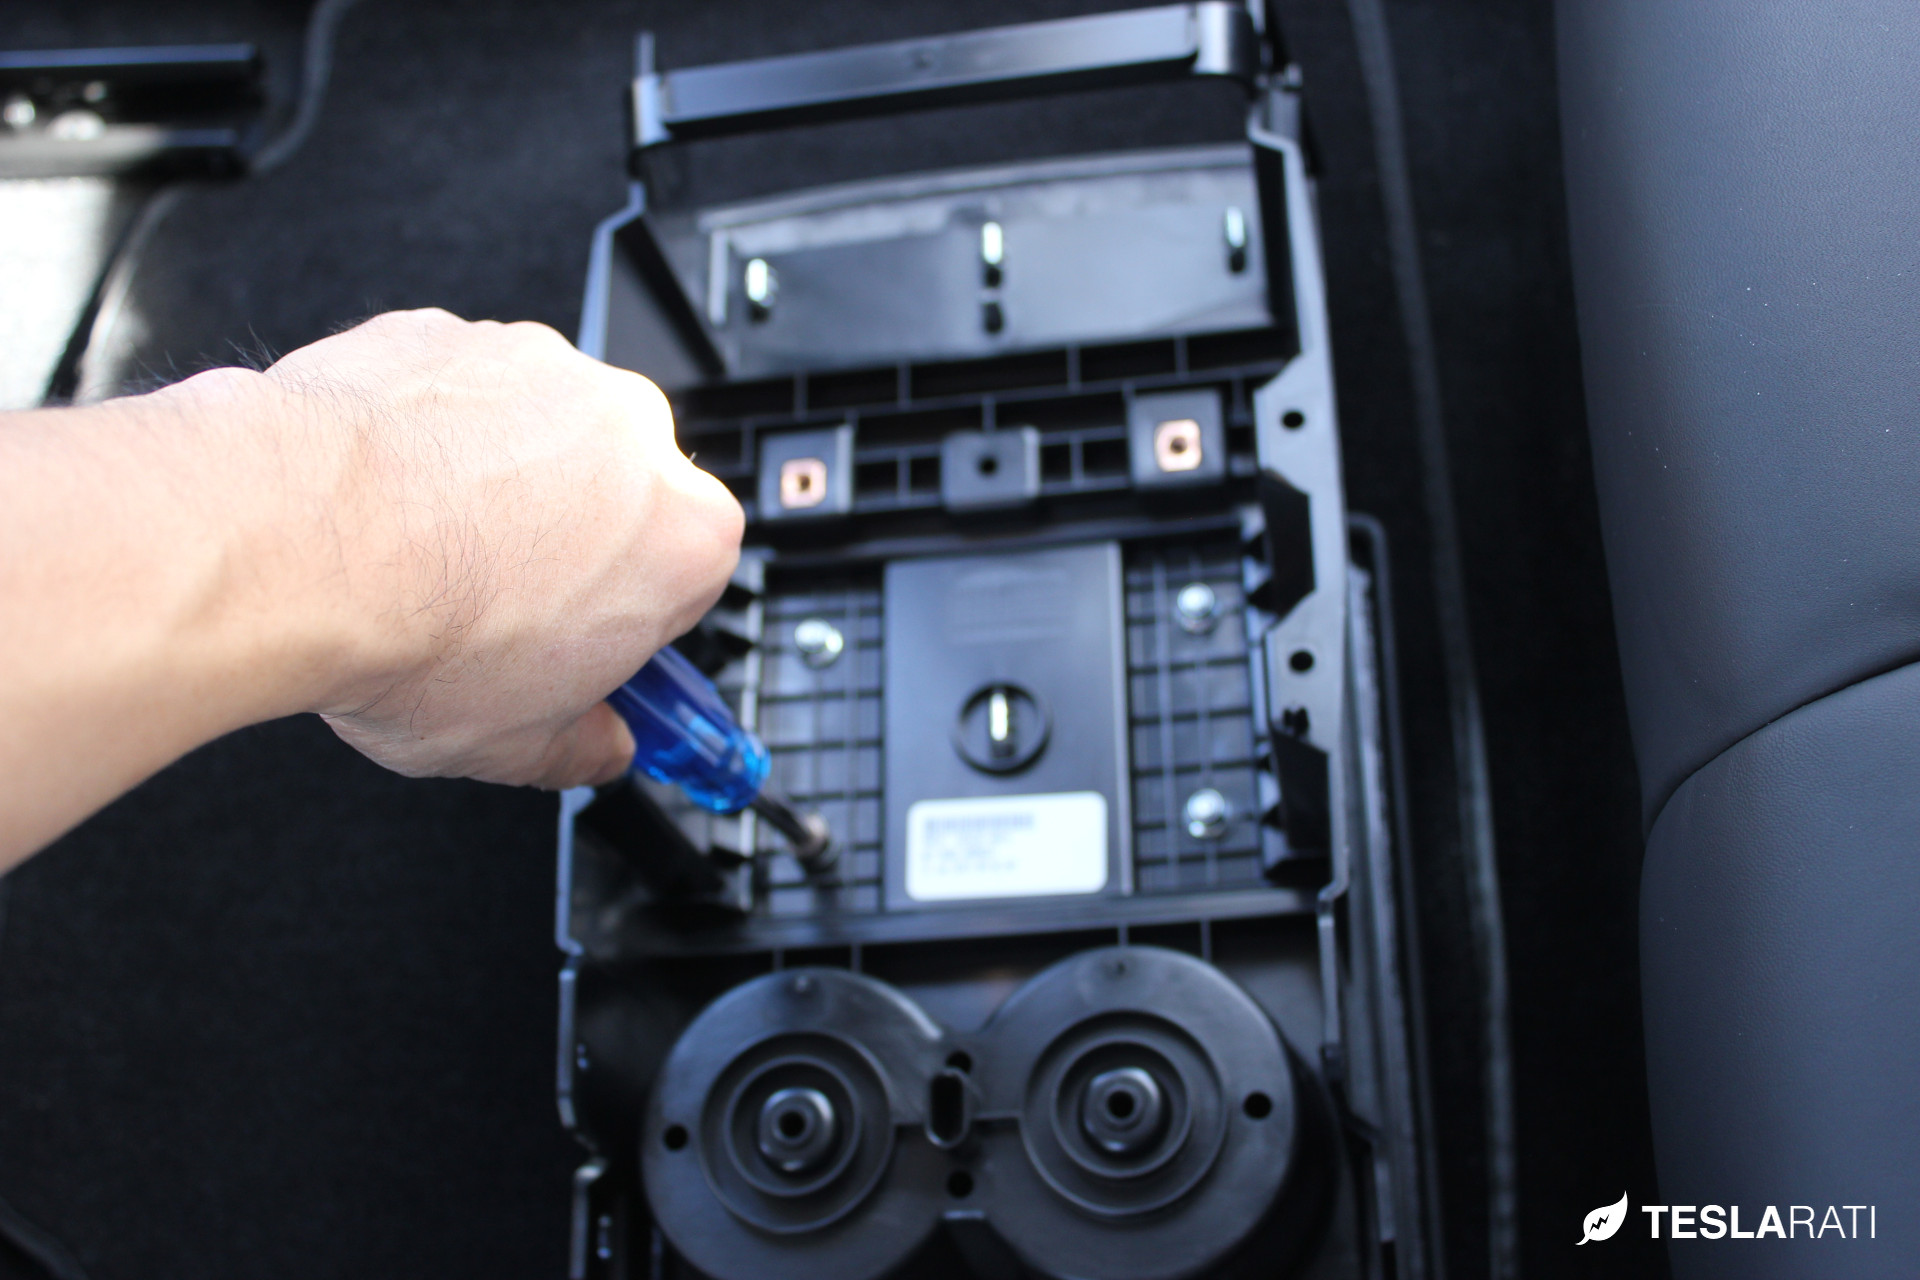
Unscrew the four 8mm nuts from the bottom of the armrest assembly[/tab] [tab]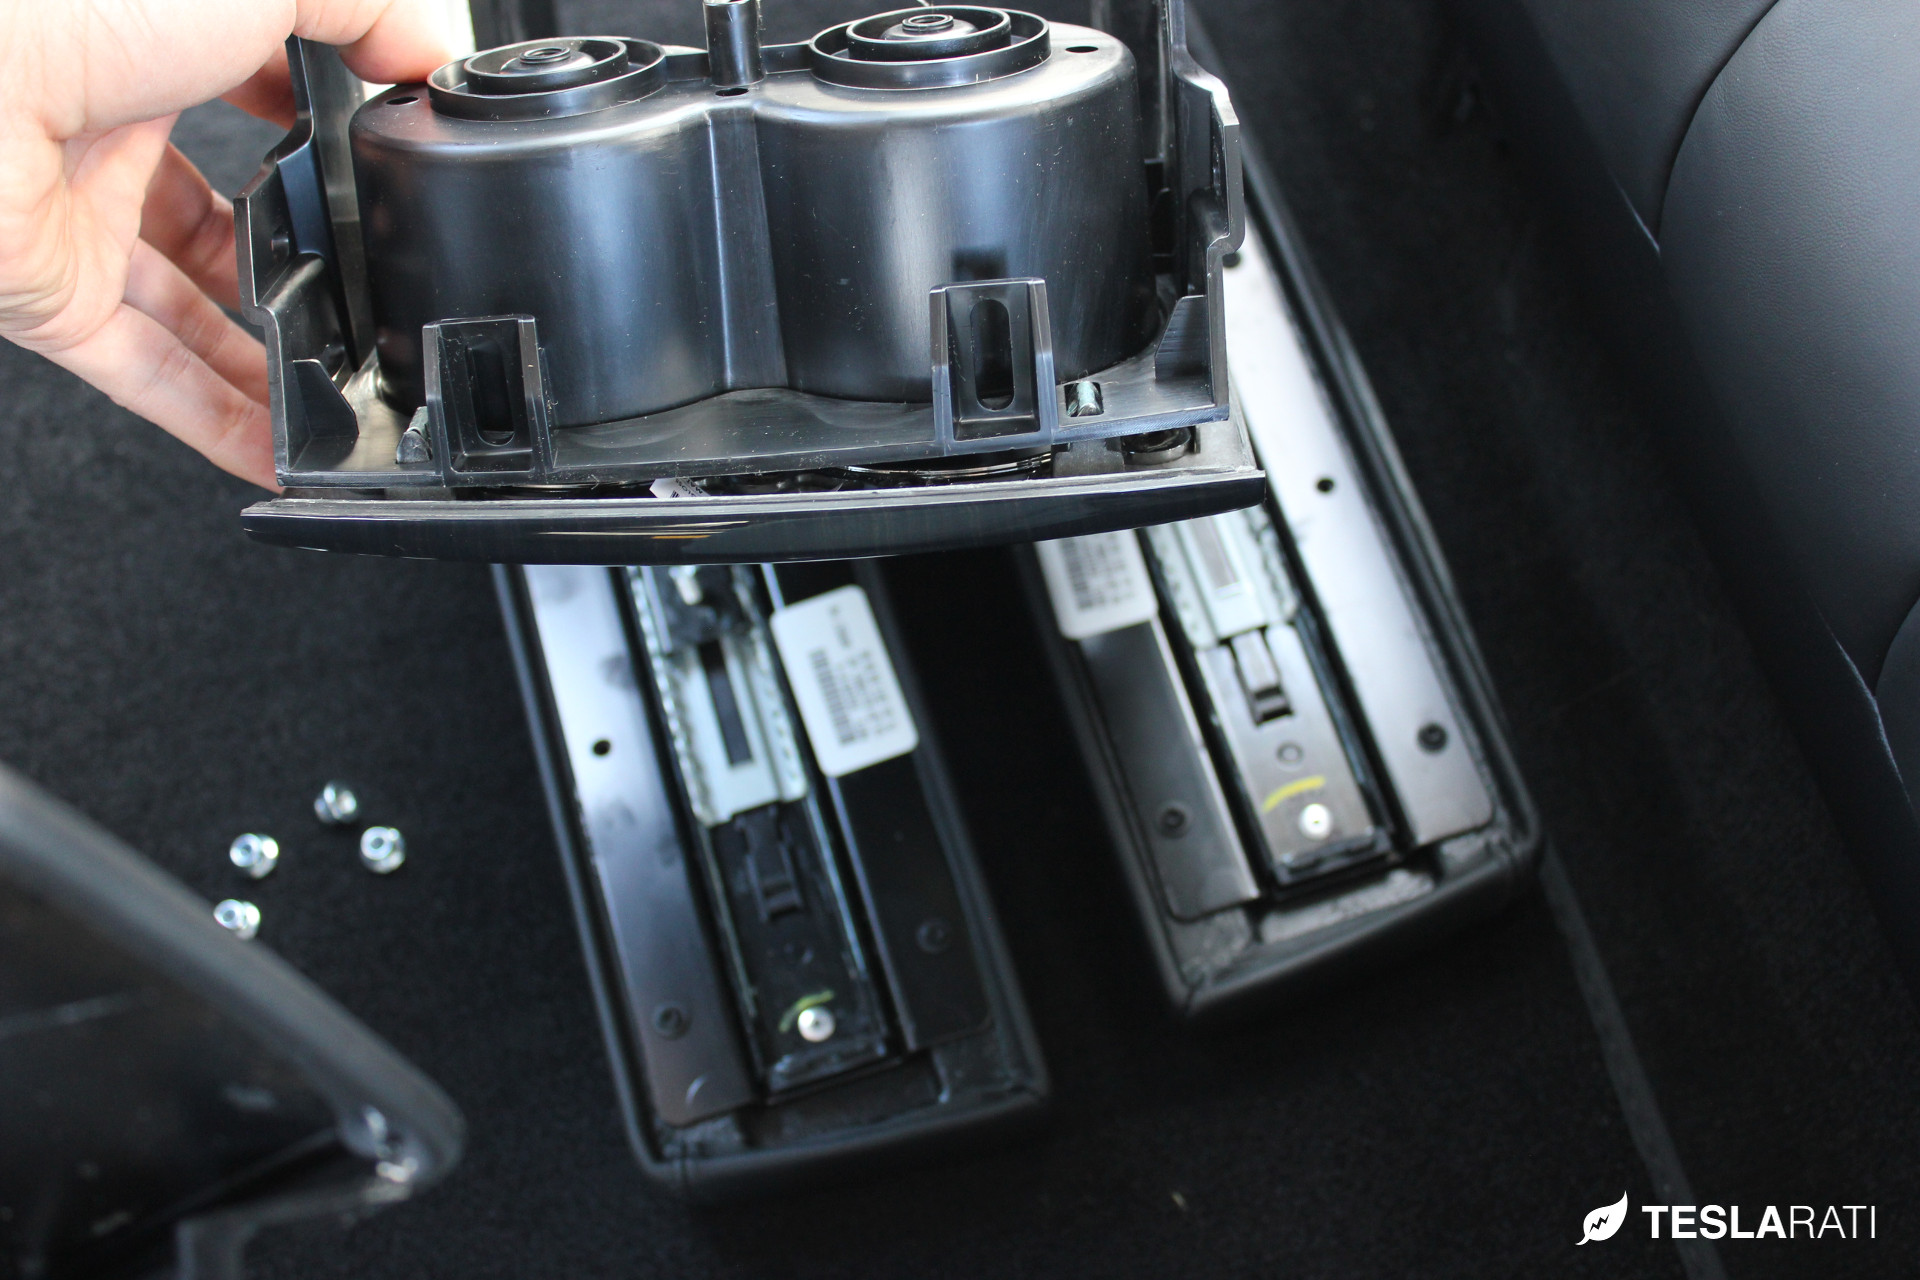
Remove armrest assembly from factory armrest cushions[/tab] [tab]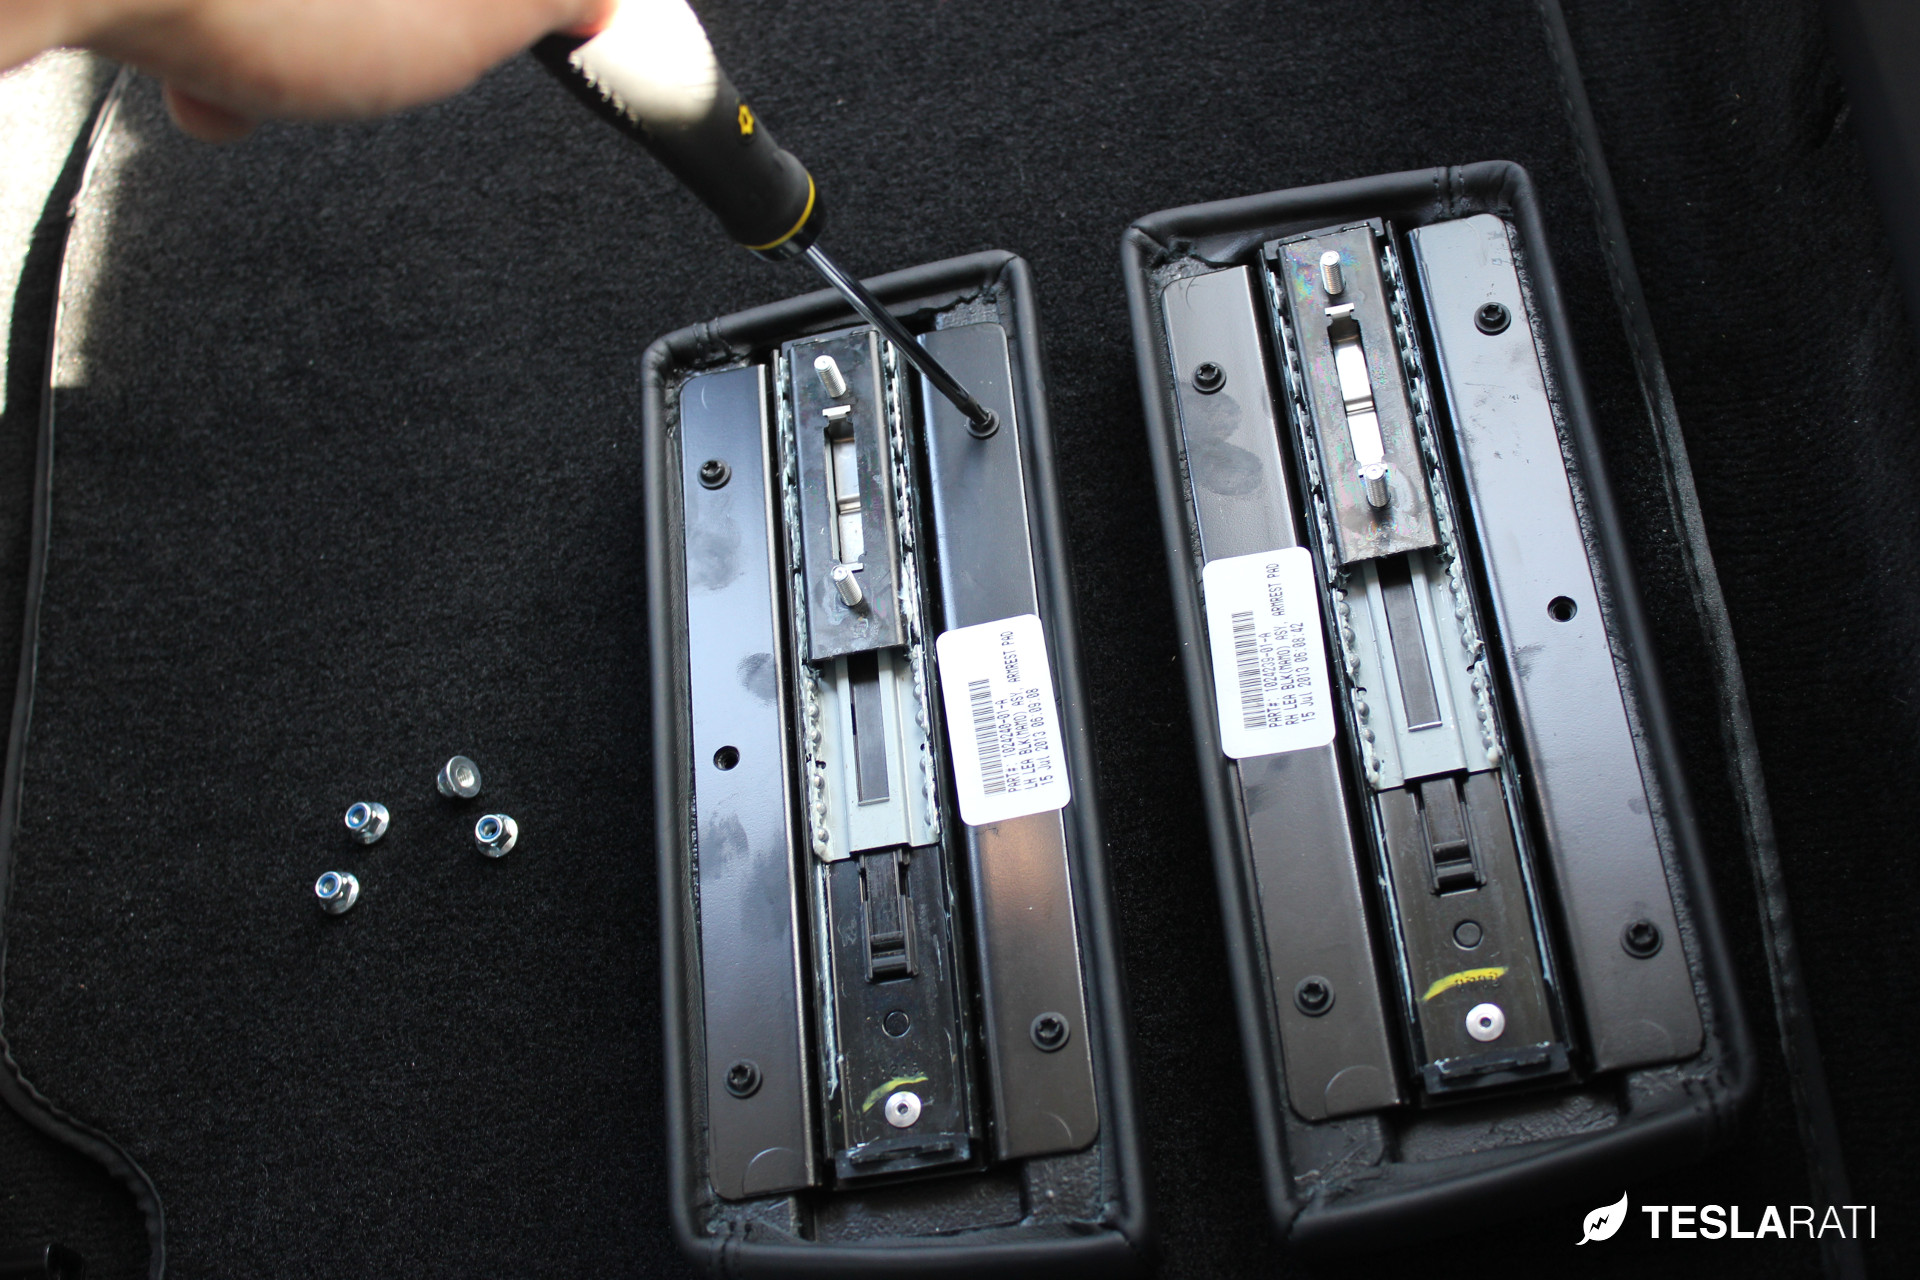
Unscrew T20 torx that secures the armrest cushions to the factory armrest sliders[/tab] [tab]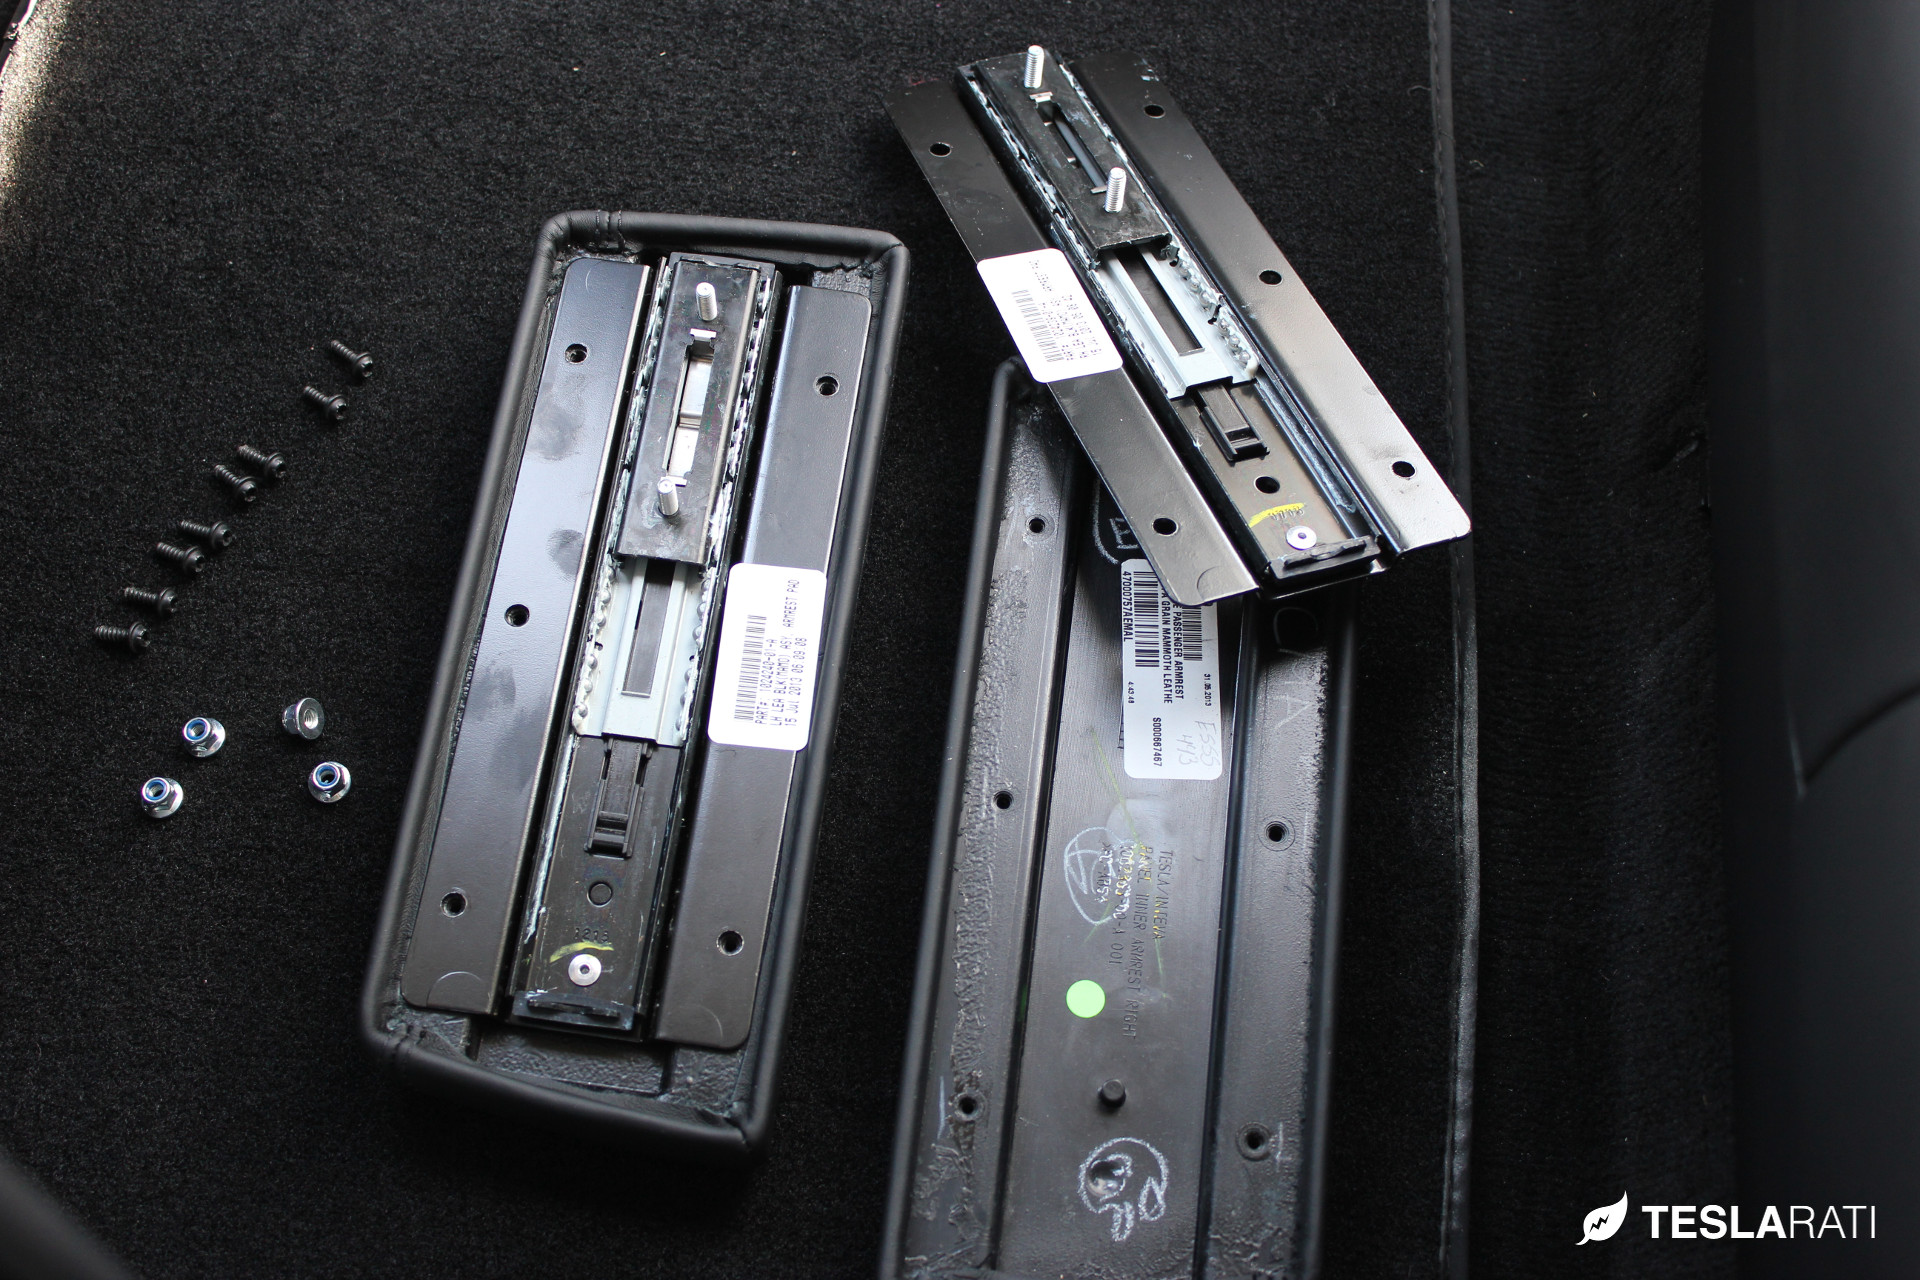
Replace the factory cushions with the new PARZ armrests and reattach to factory sliders[/tab] [/tabs]
Design, Specs, and Features
The PARZ is a true premium product as made evident by its extensive use of high-end calfskin leather and precision-molded base. We were pleasantly surprised to feel how heavy and solid the PARZ was. Each of the cup holders are machined from stainless steel and can be easily removed when needed. The cup holders are 2.75” in diameter and 2.5” deep which makes them perfect for any standard-sized coffee or canned beverage. Do we smell the potential for a future PARZ cup holder expansion accessory ala the EVannex X2?
The PARZ armrest cushions are notably taller than the factory foam armrests. Each unit measures 1 ¾” taller than the factory Model S arm rests which makes it much comfier than the factory armrest cushion, but at the same time requires a psychological adjustment period before the new height begins to feel natural.
The PARZ maintains the full functionality of the factory arm rests by attaching directly to the original slider mechanism. One of the things we liked most about the PARZ armrest is the fact that the rear seat air vents are not blocked or hindered in any way. Once the armrest is extended, beverages are situated at a perfect arm's length away and will not interfere with vehicle entry and exit.
- Size: 14.5”L x 3.75”W x 3.25”H.
- Substructure: Each armrest unit is made from custom-molded, expanding, open cell, flexible 8lb., self-skinning foam mated to an ABS casting resin base.
[tabs slidertype="images"] [imagetab width="" height=""]http://www.teslarati.com/wp-content/uploads/2013/12/PARZ_Tesla_Rear_Seat_Cup_Holders_10.jpg[/imagetab] [imagetab width="" height=""]http://www.teslarati.com/wp-content/uploads/2013/12/PARZ_Tesla_Rear_Seat_Cup_Holders_9.jpg[/imagetab] [imagetab width="" height=""]http://www.teslarati.com/wp-content/uploads/2013/12/PARZ_Tesla_Rear_Seat_Cup_Holders_8.jpg[/imagetab] [imagetab width="" height=""]http://www.teslarati.com/wp-content/uploads/2013/12/PARZ_Tesla_Rear_Seat_Cup_Holders_3.jpg[/imagetab] [imagetab width="" height=""]http://www.teslarati.com/wp-content/uploads/2013/12/PARZ_Tesla_Rear_Seat_Cup_Holders_4.jpg[/imagetab] [/tabs]
Conclusion
The Premium Arm Rest Zarf* (PARZ) is one of the most unique and well-crafted Tesla aftermarket products we've seen to date. The armrest is solid and integrates seamlessly into the existing factory sliders. The design for the cup holder receptacle provides rear seat passengers a convenient way to secure their beverages without having to worry about accidental spillage - especially great for families with kids.
Installation can be a bit daunting to those that are less handy, but at the same time, it can also be a "fun-tastic" project for any do-it-yourselfer.
The PARZ comes in three colors that perfectly match the interior upholstery of the Model S. At a price of $665, some may argue that it's a bit steep, but we don't think that's a fair assessment until one actually sees and feels the product in person.
Learn more about the PARZ at EVannex.
Questions?
Leave us a question or comment below and we'll be sure to respond!
DIY
Tesla Model 3 pickup “Truckla” gets updates and a perfectly wholesome robot charger
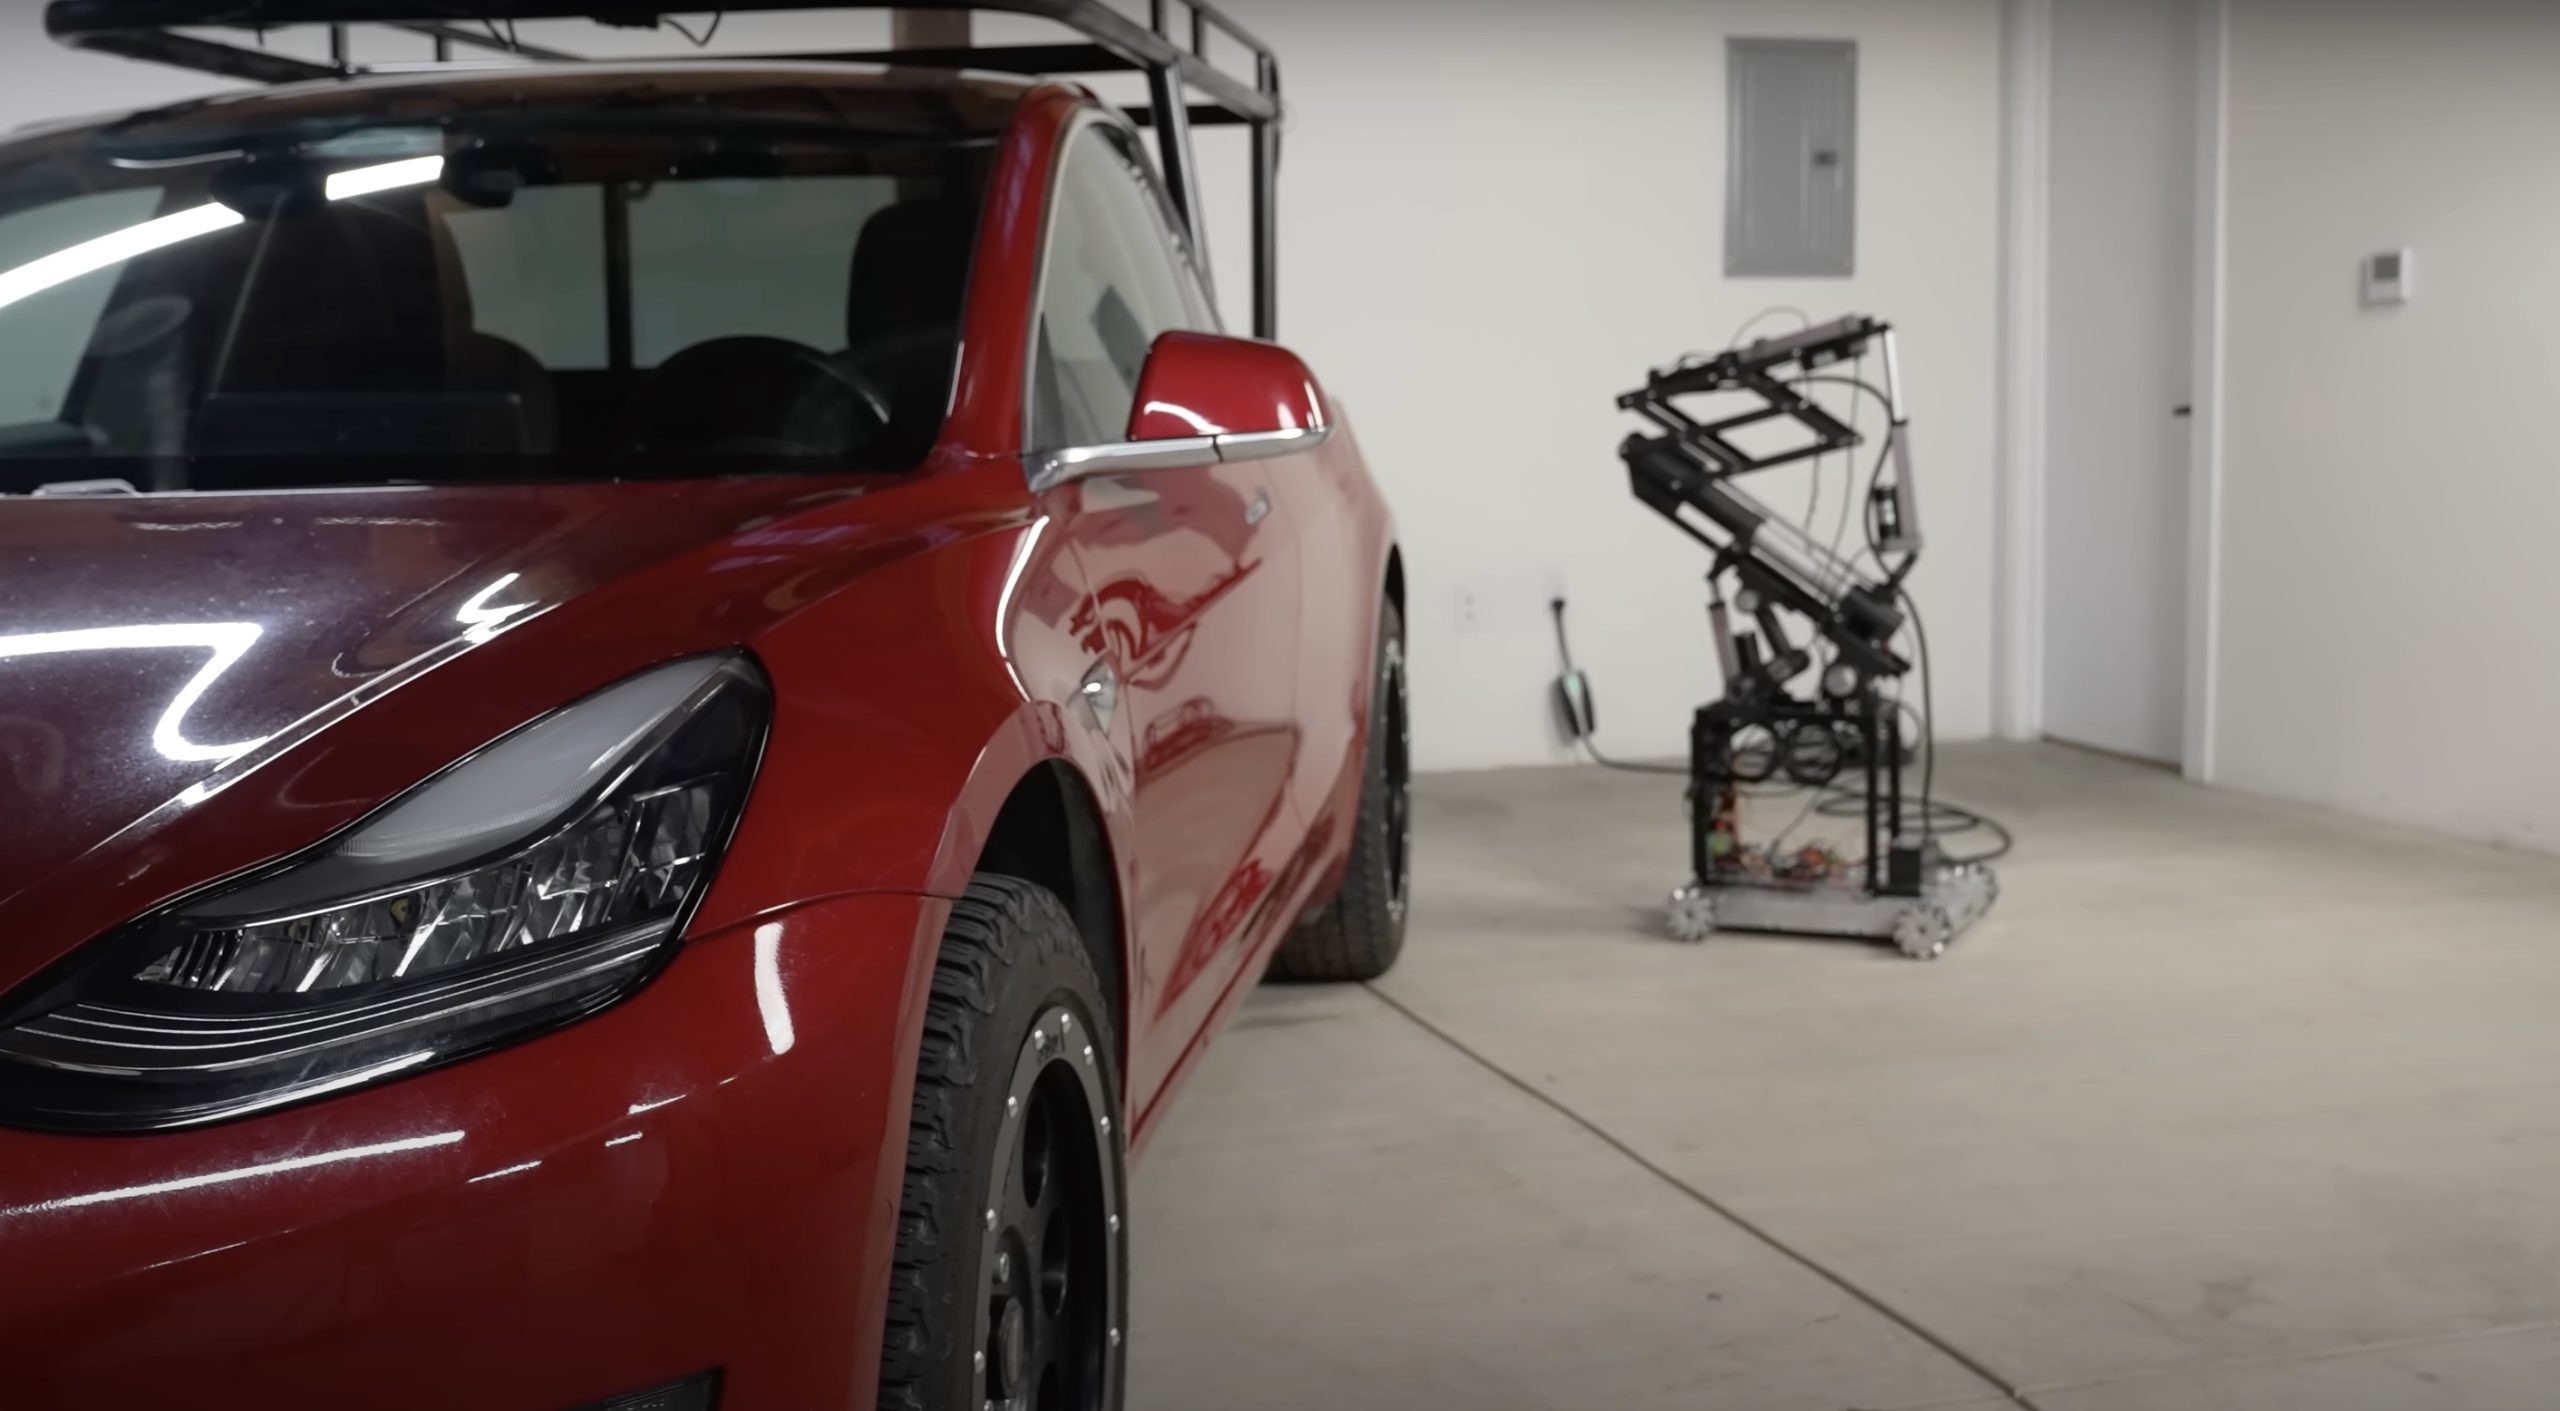
Back in 2019, YouTuber Simone Giertz, the self-proclaimed “Queen of Sh*tty Robots,” created a one-off Tesla Model 3 build that took the automotive world by storm. Fondly dubbed as “Truckla,” Giertz noted that the vehicle was actually her dream car — as crazy as that may sound.
Now almost four years later, the YouTuber posted an update on Truckla. And just like every other big project that one probably started, Giertz stated that she actually stopped working on Truckla when the vehicle was about 80% complete. The car is driving though, but a lot of stuff was not really working very well.
Thus, for her Truckla update, Giertz shared how most of her Model 3 pickup truck conversion was essentially completed. Truckla got a lot of detailing done, she got a slight lift, and she now has a functional tailgate. One has to admit, Truckla’s tailgate is pretty darn cool.
The “Queen of Sh*tty Robots” also opted to give Truckla a friend in the form of an automatic robot charger. Unlike Tesla’s rather interesting snake charger from years past, Truckla’s charger would come in the form of a rover, thanks to her friends at robotics platform Viam. Giertz aptly named Truckla’s robot charger friend “Chargela,” which is an appropriate name for such an invention.
Also true to form for Giertz, Chargela’s first encounter with Truckla was just a tiny bit awkward. One could say that Chargela may have just been a little bit nervous on his first try without human hands helping him. Most importantly, the system did work, so Giertz would likely keep using Chargela for her Model 3 pickup.
Teslas are very tech-heavy vehicles, so projects like Giertz’s Truckla are always remarkable. The fact that the Model 3 works perfectly fine despite having a good chunk of it cut off and turned into a pickup truck bed is mighty impressive any way one looks at it. Overall, Truckla will always be one of the coolest Tesla DIY projects to date, so any updates about the vehicle are always appreciated.
Truckla’s nearly four-year update can be viewed below.
Don’t hesitate to contact us with news tips. Just send a message to simon@teslarati.com to give us a heads up.
DIY
Tesla fan creating ‘CyberRoadster’ using Model 3 Performance parts in epic DIY build
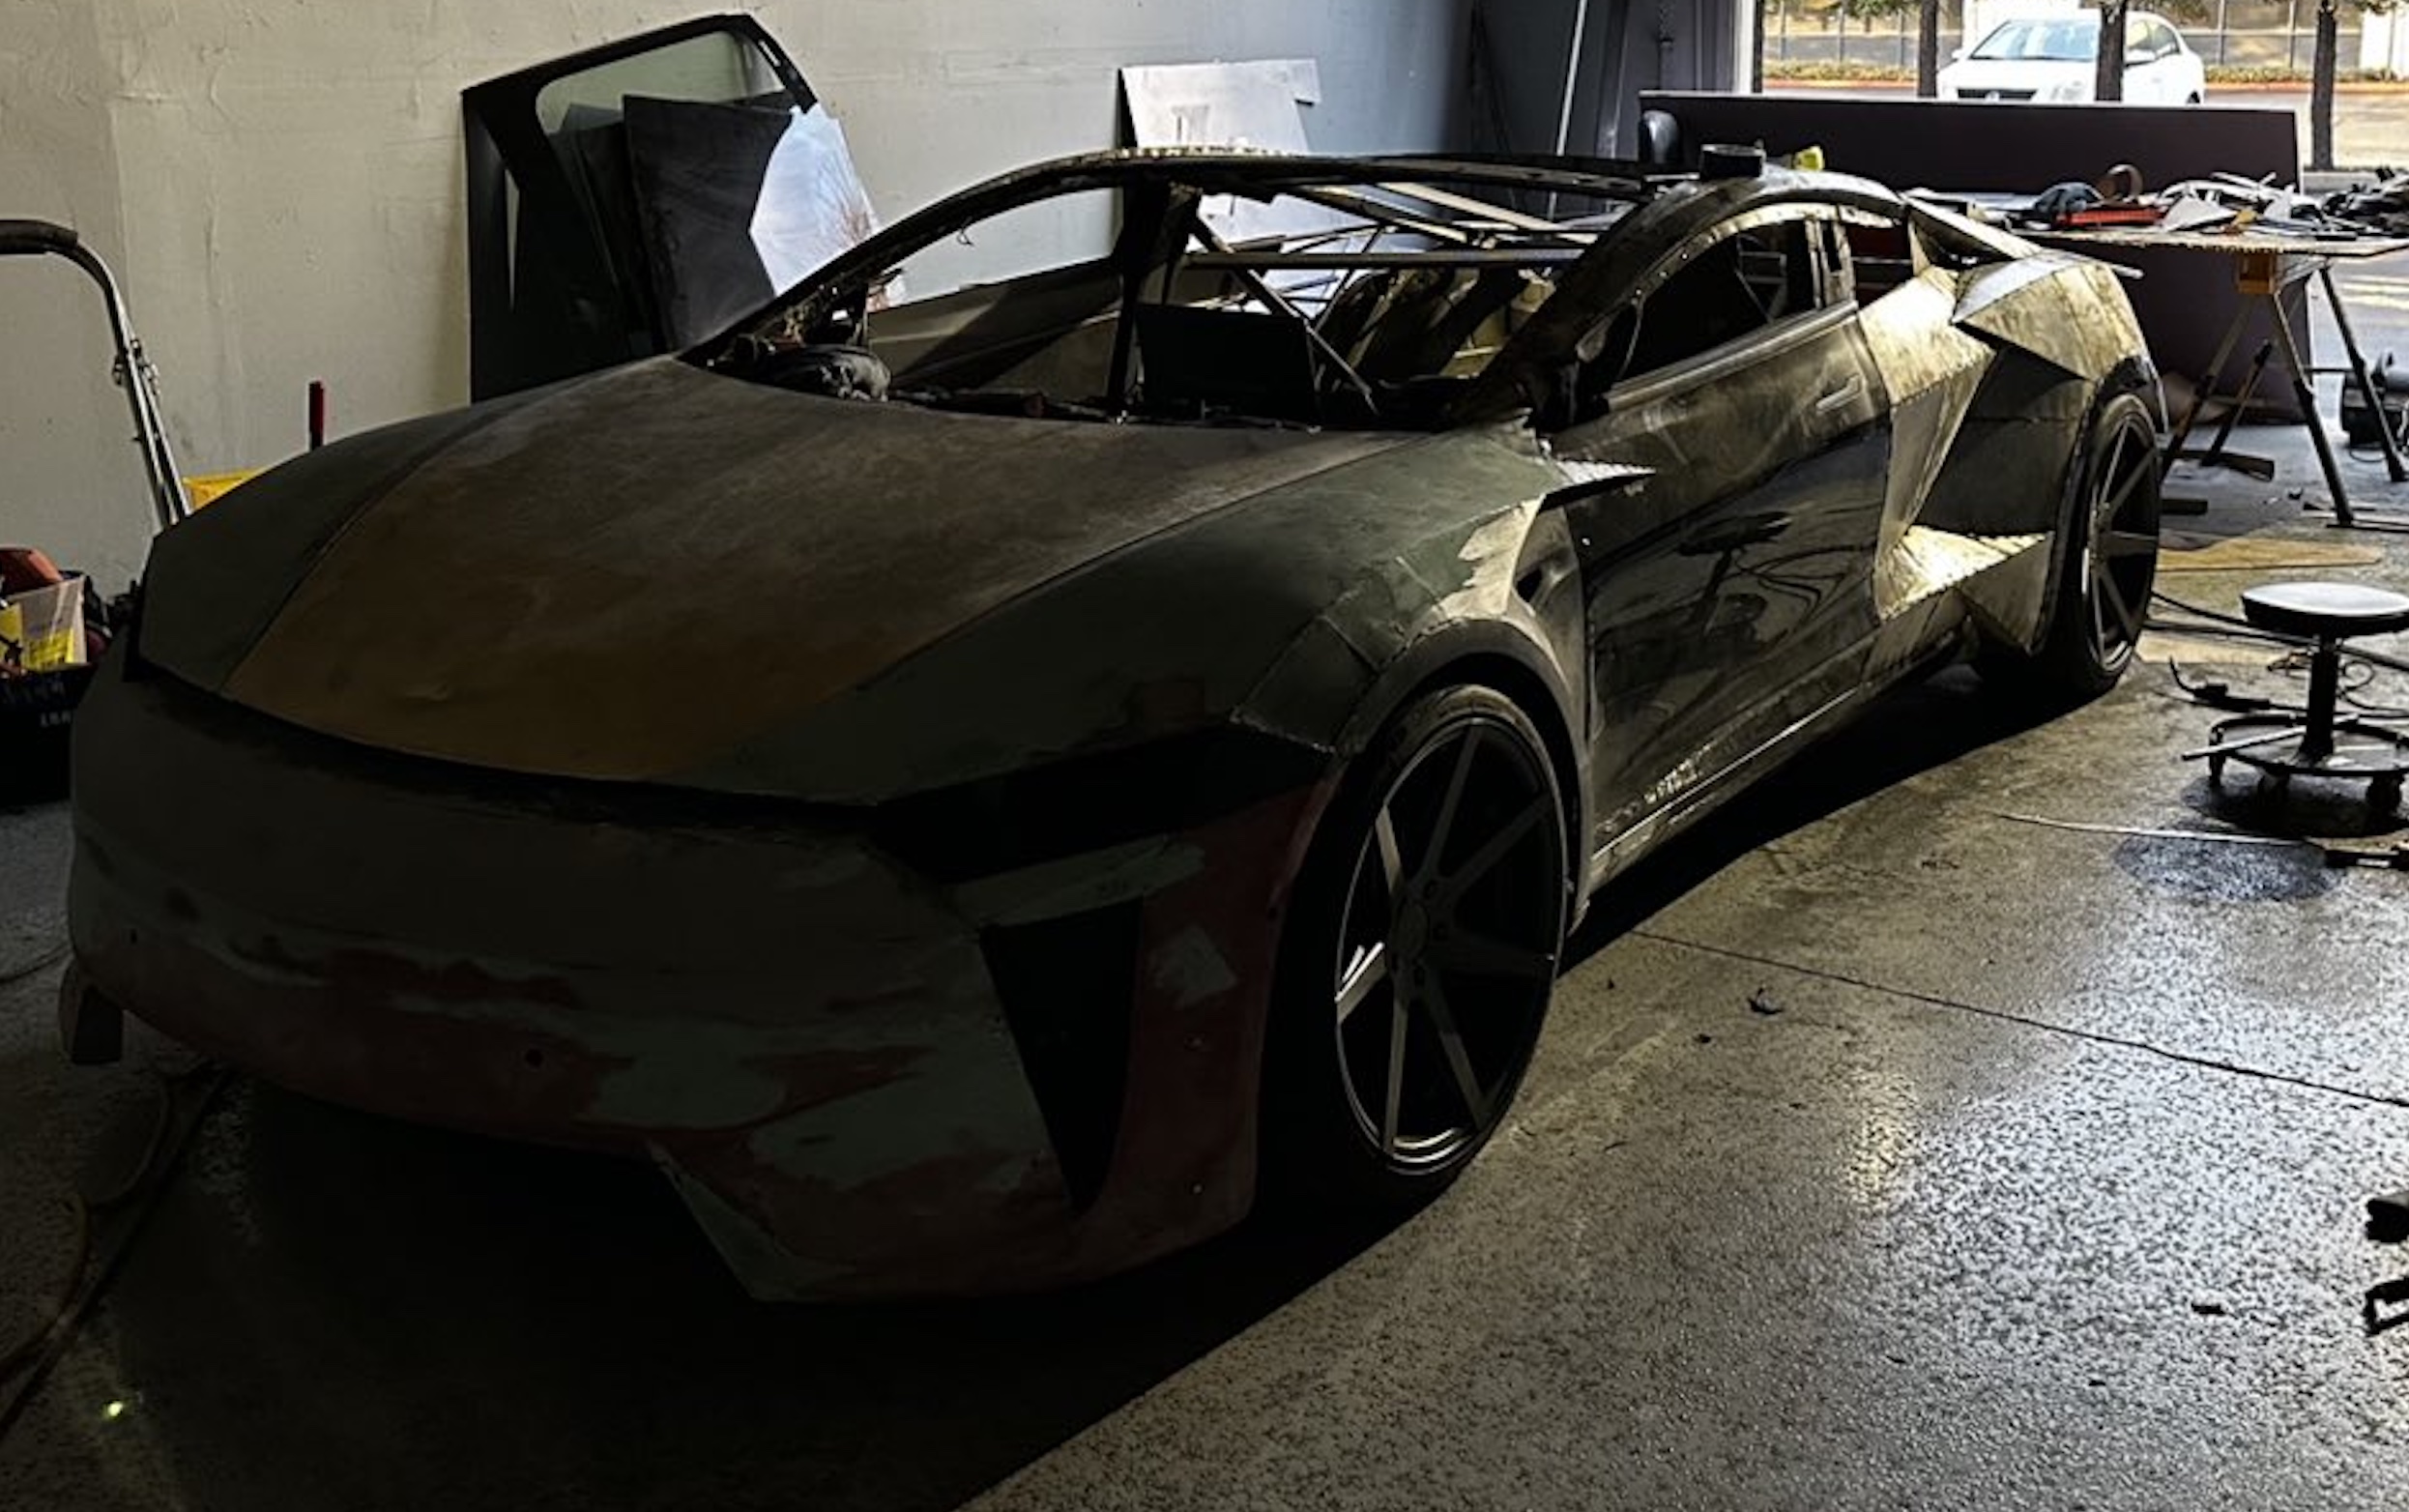
A Tesla owner is taking his hobby and love for electric vehicles to new levels by creating what could only be described as one of the coolest EV-related DIY projects to date. The idea for the project is simple: what happens when you cross a supercar with the Cybertruck? You end up with a two-seater CyberRoadster.
Tesla owner David Andreyev, who goes by the username @Cyber_Hooligan_ on Twitter, has spent the last few months creating a Cybertruck-inspired version of the next-generation Roadster made from a salvaged Model 3 Performance. Starting with a Model 3 Performance is an inspired choice, considering that it is Tesla’s first vehicle that has a dedicated Track Mode.
A look at Andreyev’s YouTube channel, which can be accessed here, shows the meticulous build that the Tesla owner has implemented on the project car. What’s particularly cool about the CyberRoadster is the fact that it’s being built with parts that are also from other Tesla vehicles, like its front bumper that came from a new Model S. Recent videos suggest that the project car’s rear bumper will be from a new Model S as well.
The journey is long for Andreyev, so the completion of the CyberRoadster will likely take some more time. Despite this, seeing the Tesla owner’s DIY journey on such an epic build is more than satisfying. And considering that the CyberRoadster is evidently a labor of love from the Tesla owner, the final results would likely be extremely worth it.
There’s a lot of crazy Tesla modifications that have been done as of late. But some, as it is with a lot of things on the internet these days, have become more silly gimmicks than serious automotive projects. Fortunately, car enthusiasts like Andreyev, who just happen to also love electric vehicles, are taking it upon themselves to create one-of-a-kind EVs that would surely capture the attention of anyone on the road.
Check out the latest video in the CyberRoadster’s creation below.
Don’t hesitate to contact us with news tips. Just send a message to simon@teslarati.com to give us a heads up.
DIY
Tesla owner ‘charges’ Model 3 with homemade solar panel trailer
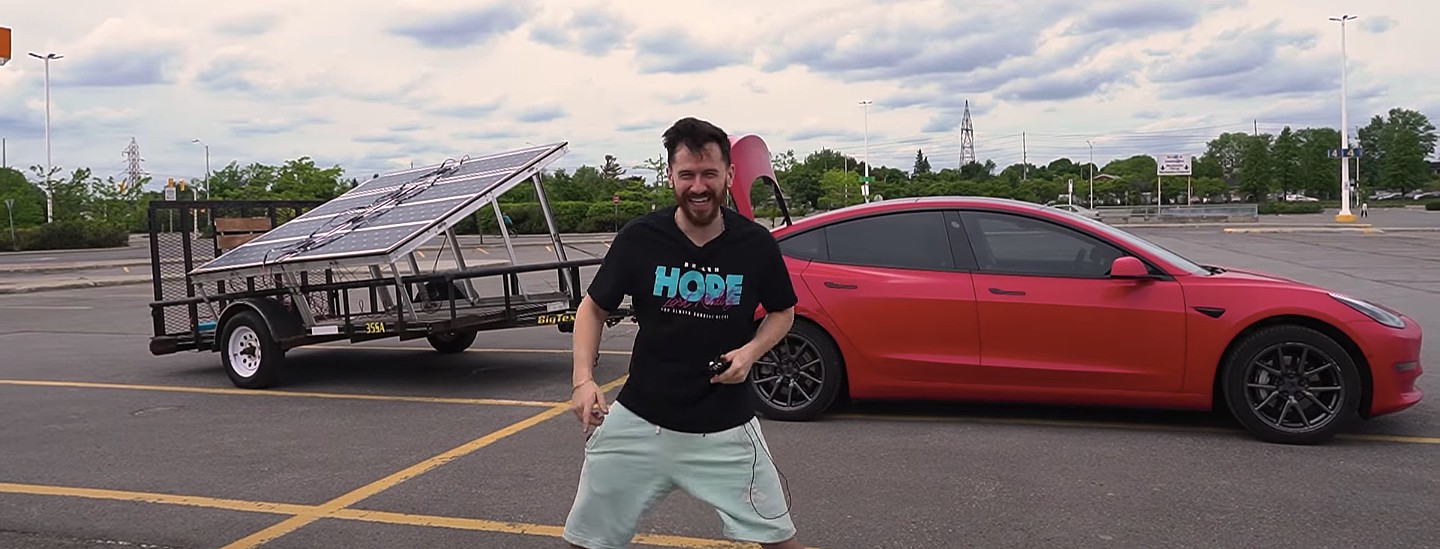
A Tesla owner has demonstrated a rather novel way to charge his Model 3. In a recent video, Sean Callaghan of the ItsYeBoi YouTube channel opted to use a series of off-the-shelf solar panel sheets onto a towable trailer to create a mobile charging unit for his all-electric sedan.
Callaghan planned to use only the sun and the solar sheets purchased from e-commerce platform Wish to charge his Model 3. The solar panel sheets would collect energy from the sun and transfer it to a control panel. The control panels were connected to batteries that would hold the energy—the batteries connected to an inverter, which would then charge the Tesla Model 3.
The entire assembly would provide the Model 3 with about 800 watts of energy on a completely sunny day. However, Callaghan shot the video when weather was overcast, so the entire solar panel trailer build only managed to provide around 300 watts throughout the YouTube host’s test.
To put this into perspective, a 100 volt home wall outlet provides 1.4 kilowatts of power, or 1,400 watts. Therefore, the 300-watt solar panel assembly built by Callaghan was producing less than 25% of the energy of a typical wall outlet. This is pretty marginal compared to Tesla’s 250-kilowatt V3 Superchargers, which provides 250,000 watts, or about 833 times as much power as the makeshift solar panel build.
However, Callaghan’s goal was not to charge the vehicle quickly. He explained the idea came from a previous video where he used a $5,000 Wish-purchased wind turbine to charge his Model 3. He wanted to test the effectiveness and efficiency of the system, which was questionable due to the time it would take to charge the battery fully.
The Model 3 battery pack is 78 kWh, and with Callaghan’s 300-watt system charging his electric vehicle, it would take 260 hours to supply the Tesla’s battery to full capacity.
In the past, electric vehicle enthusiasts have asked Tesla CEO Elon Musk why the company’s vehicles do not contain solar glass roofing, which would charge the car while the owner is driving. Musk has explained that the efficiency of this idea is challenging and likely would not provide an ample amount of range.
When asked about the idea of putting solar panels on the top of Tesla’s vehicles in 2017, Musk responded that the idea was “Not that helpful, because the actual surface of the car is not that much, and cars are often inside. The least efficient place to put solar is on the car.” It also would not be cost-effective for Tesla because “the cost of the panels and electronics, R&D and assembly would never pay for itself in the life of the vehicle, compared to charging from the wall in your garage,” Quartz noted.
That being said, Tesla plans to implement solar panels onto the motorized tonneau of the upcoming Cybertruck. The idea was discussed on Twitter when Musk stated that the optional feature would add “15 miles per day, possibly more” when parked in the sunlight. Also, fold-out solar wings could help capture enough solar energy for 30 to 40 miles a day.
Watch Sean Callaghan’s video of his makeshift solar panel trailer below.


